Showing posts with label organic seeds. Show all posts

Friday, 3 October 2014

Kitchen Scraps Garden Part Two: Carrot Seeds

Most kitchen gardeners grow carrots, and I am no exception. My daughters love eating them, and generally I find them easy to grow. While seeds are not overly expensive, I find I go through a great deal of them each year because of having to sow so many then thinning the seedlings to allow for adequate growth.

I have been experimenting with growing food from kitchen scraps, and I saw a post somewhere about planting the tops of carrots to produce seeds. As a novice gardener I am beginning to delve into seed saving, which has so many benefits. This seemed like a perfect fit.


Continue reading at The Green Phone Booth>>>


Friday, 18 July 2014

The Benefits of Bolting

We are approaching the dog days of summer and in the heat many vegetables are starting to flower. I am always surprised when I see people pulling up all their plants that have bolted, to make way for new plants. Of course once some plants have bolted their greens are bitter to taste and we need to remove them so that we can have a continuous supply of plants to eat. But those plants that have flowered are great for the garden. I would like to make an argument for intentionally letting some vegetables flower and go to seed.

Seed Saving

Leaving plants to go to seed, and then collecting the seeds, may not be on the list for novice gardeners, but I believe that it is important. It provides free seeds for subsequent years' gardens, which is always a good thing. It also preserves a diverse living history of plants so that we can maintain and grow plants that we do not typically see in the grocery store. There are many other benefits to seed saving, but an important one is that it takes the control of seeds out of the hands of corporations such as Monsanto and their terminator seeds.

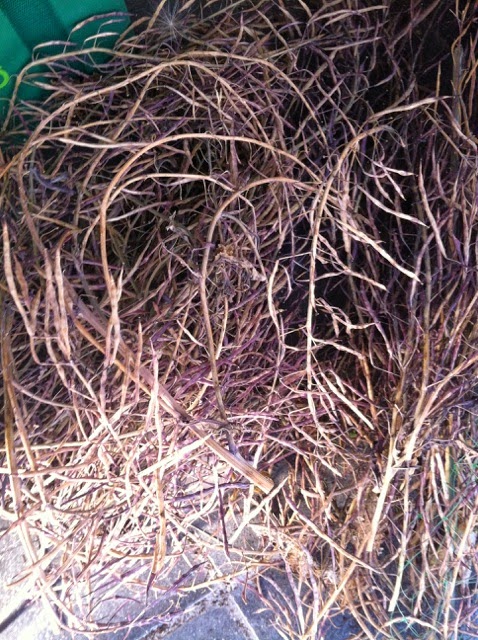
Kale seed pods drying.

Continue reading at The Green Phone Booth>>>

Friday, 3 January 2014

Gardening Intentions for 2014


In the last week of December I received a 2014 seed catalogue from a local seed company, and when I saw it my heart skipped a beat. This meant that I can begin to think about my garden for 2014 in earnest. I can dream about what I will grow in my new garden. It may seem early to be thinking about the coming growing season, but many seeds can be started indoors in late February or early March, and last year I missed the window for some of the early varieties.

The new year naturally is a time to reflect on the year that was and look ahead to goals and plans for the coming year, but I don’t like to make specific and definite statements because I feel like a failure when I don’t follow through. Instead, I like to have intentions, which at least in my mind is different from resolutions.

Thursday, 12 September 2013

Growing and Harvesting Quinoa

After seeing a very wise gardener friend's photo of her quinoa harvest on Facebook last summer, I knew I had to add quinoa to my garden this year. I direct sowed the seeds into the end of one of my raised beds nearest my patio (mistake #1) completely unaware of what quinoa looks like when growing (mistake #2).

The seedlings came up fairly quickly and grew rapidly. Within a few weeks I had tasty baby greens similar in texture to spinach that I used in salads. However, it soon became clear that the quinoa was going to be tall. I decided to google what quinoa looks like when it is growing and I discovered, much to my surprise, that it can grow to over six feet tall! I was suddenly aware that I had planted it in the wrong spot in my garden, because it quickly blocked my view of everything else growing in the beds behind it. While it is lovely when growing, I wanted to see my cucumber trellis, mustard greens, chard and beets when I sat on my patio. Note to self: grow quinoa at the back of the garden if possible.

It certainly was a conversation piece in my garden, and I enjoyed sharing what quinoa plants look like to anyone who paused long enough in my garden to listen to me (or anyone that I could drag into my garden to listen to me).

By August the quinoa was developing the "flowering" tops where the seeds would eventually grow.


It became infested with aphids. Luckily ladybugs set up shop and happily feasted on them. My girls loved watching them and they learned about the life cycle of ladybugs as a result (yay for inquiry based learning).

By the end of August the tops turned a "calico" colour of reds and yellows and the leaves were falling off the stalks.


At this point I cut the tops off and let them dry before removing the seeds. However, I made mistake #3 when I left them on my patio table; shortly after this we had a rain storm and I had to rush out to move them to a covered area of my patio.


Now let me say right up front that I had (still have?) no idea how to remove the seeds from the bitter saponin covering. I did some online research and asked my amazing gardening friend how she did it. Then I improvised my own method based upon what I had learned.

I started by running my fingers along the stalks to pull the seeds off. When I was done I had a fairly large bag!


Because the seeds sink and the twigs and saponin float, I used a food processor to agitate on high speed and separate everything.


I knew that the saponin of soap nuts is what is used to clean clothes, but it was still surprising to see the foamy, soapy water when agitating the quinoa!


I poured off the chaff, refilled the container and put through the processor several more times for each batch until nothing floated, and put the seeds aside. I did this until there was no more left to separate.


When I had nothing but seeds remaining, I put them into the processor again and agitated on high speed to ensure that I had all the saponin removed.


When nothing was left floating I washed the seeds with fresh water until the water was no longer murky.


This is what I had left.

The total chaff is on the left and the cleaned seeds are on the right.

The next step was to dry the seeds. My friend mentioned to me that she had a problem with her seeds going moldy despite thinking they were completely dry. I don't own a food dehydrator to help with this so I decided to dry them on a low heat in the oven, which took several hours. My husband thought the house smelled amazing, but my youngest daughter kept on asking, "What that bad smell?"


This is how much I had after drying.


I learned a great deal going through this process. I know what I will do differently next year, and I am going to do some more research into the best way to dry the cleaned quinoa seeds.

What amazes me, and what intrigued me from my friend's photo of her quinoa harvest last summer, is how little I ended up after drying. I had approximately ten plants and I was left with a very small bowl of seeds, probably enough for 2 - 3 meals for my husband and myself (my daughters won't eat it).

It really brings home the idea that we should be more grateful for all of the food we eat that other people grow for us. Our food is worth more than we pay for it and yet we think it is too expensive now. My small bowl of quinoa is like gold to me. It took about three hours doing this by hand, for a small bowl. I kept saying to my husband that I am now willing to pay whatever they charge for organic quinoa.


Growing my own food has taught me so many lessons - patience, planning, acceptance and gratitude. I can now expand my understanding of gratitude to being thankful for all of the people in this world who grow organic food for us.


Wednesday, 6 February 2013

A Fabulous Fundraiser

Just in time to start thinking about spring and the coming growing season, my youngest daughter's preschool is doing what I think is the best fundraiser idea ever. Ok, I may be a little biased because I have done a vegetable garden for the past few years. They are selling seed kits from West Coast Seeds! I love this for several reasons.

As I've already said, I love my vegetable garden and I am excited to learn more this year. The kits range from flowers to container gardening for people with limited space to heirloom varieties. Check out the tomato varieties below. Hmm, which ones to pick for my garden this year?

I also love West Coast Seeds. They are an ethical company involved in the community, they sell organic and heritage seeds (no GMO), and their staff is very helpful. I recently bought an indoor growing system and my entire family is watching the sprouts grow before our eyes (seriously, every time we look at the sprouts they are bigger!).

I especially love that  it is a fundraiser that encourages people to grow their own food and educates children about gardening and the environment.

If you are local and would like to purchase a seed kit, contact me or leave a comment here.

The seeds are sold in kits. Kits A - K are $15.00 and the Deluxe Kit is $34.95

A. Annual Favourites Collection: alyssum, jewel nasturiums, Flanders poppies, giant blue point zinnia, sensation cosmos, sparky marigold

B. Cut Flowers Collection: Pacific beauty calendula, red beauty zinnias, baby's breath, rainbow snapdragons, mixed cornflowers, multiflora sweet peas

C. Sunflower Collection: velvet queen, lemon queen, autumn beauty, peredovik, teddy bear, giantess

D. Perennial Flowers Collection: Veronica "blue bouquet", columbine, echinacea coneflowers, Iceland poppies, shasta daisy, verbena

E. Sweet Pea Collection: bijou, mammoth, matucana, high scent, old spice

F. Heirloom Vegetable Collection: dragon tongue bean, scarlet nantes carrot, red Russian kale, little marvel pea, Amish deer tongue lettuce, small sugar pumpkin

G. Gourmet Salad Collection: raddichio, lemon cucumber, super gourmet lettuce blend, scallions, mokum carrot, French breakfast radish

H. Baby Greens Collection: Bull's blood beets, komatsuna, red mustard, chicory, chervil, salad bowl lettuce

I. Herb Garden Collection: cilantro, parsley, basil, chives, dill, sage

J. Patio Vegetable Collection: valentino bean, patio cucumber, lettle gem lettuce, little marvel pea, gypsy pepper, tumbler tomato

K. Heirloom Tomato Collection: brandywine, gold nugget, bonny best, black krim, yellow pear, Italian paste

L. Top 10 Deluxe Collection: parsnip, eggplant, pepper, tomato, broccoli, rainbow swiss chard, carrot, West Coast market mix, zucchini, spinach